Character Controller
The Character Controller template provides a starting point for third-person games, featuring joystick controls, a follow camera, and customizable animations. Easily swap character models, adjust movement settings, and add accessories to personalize this into your own game!
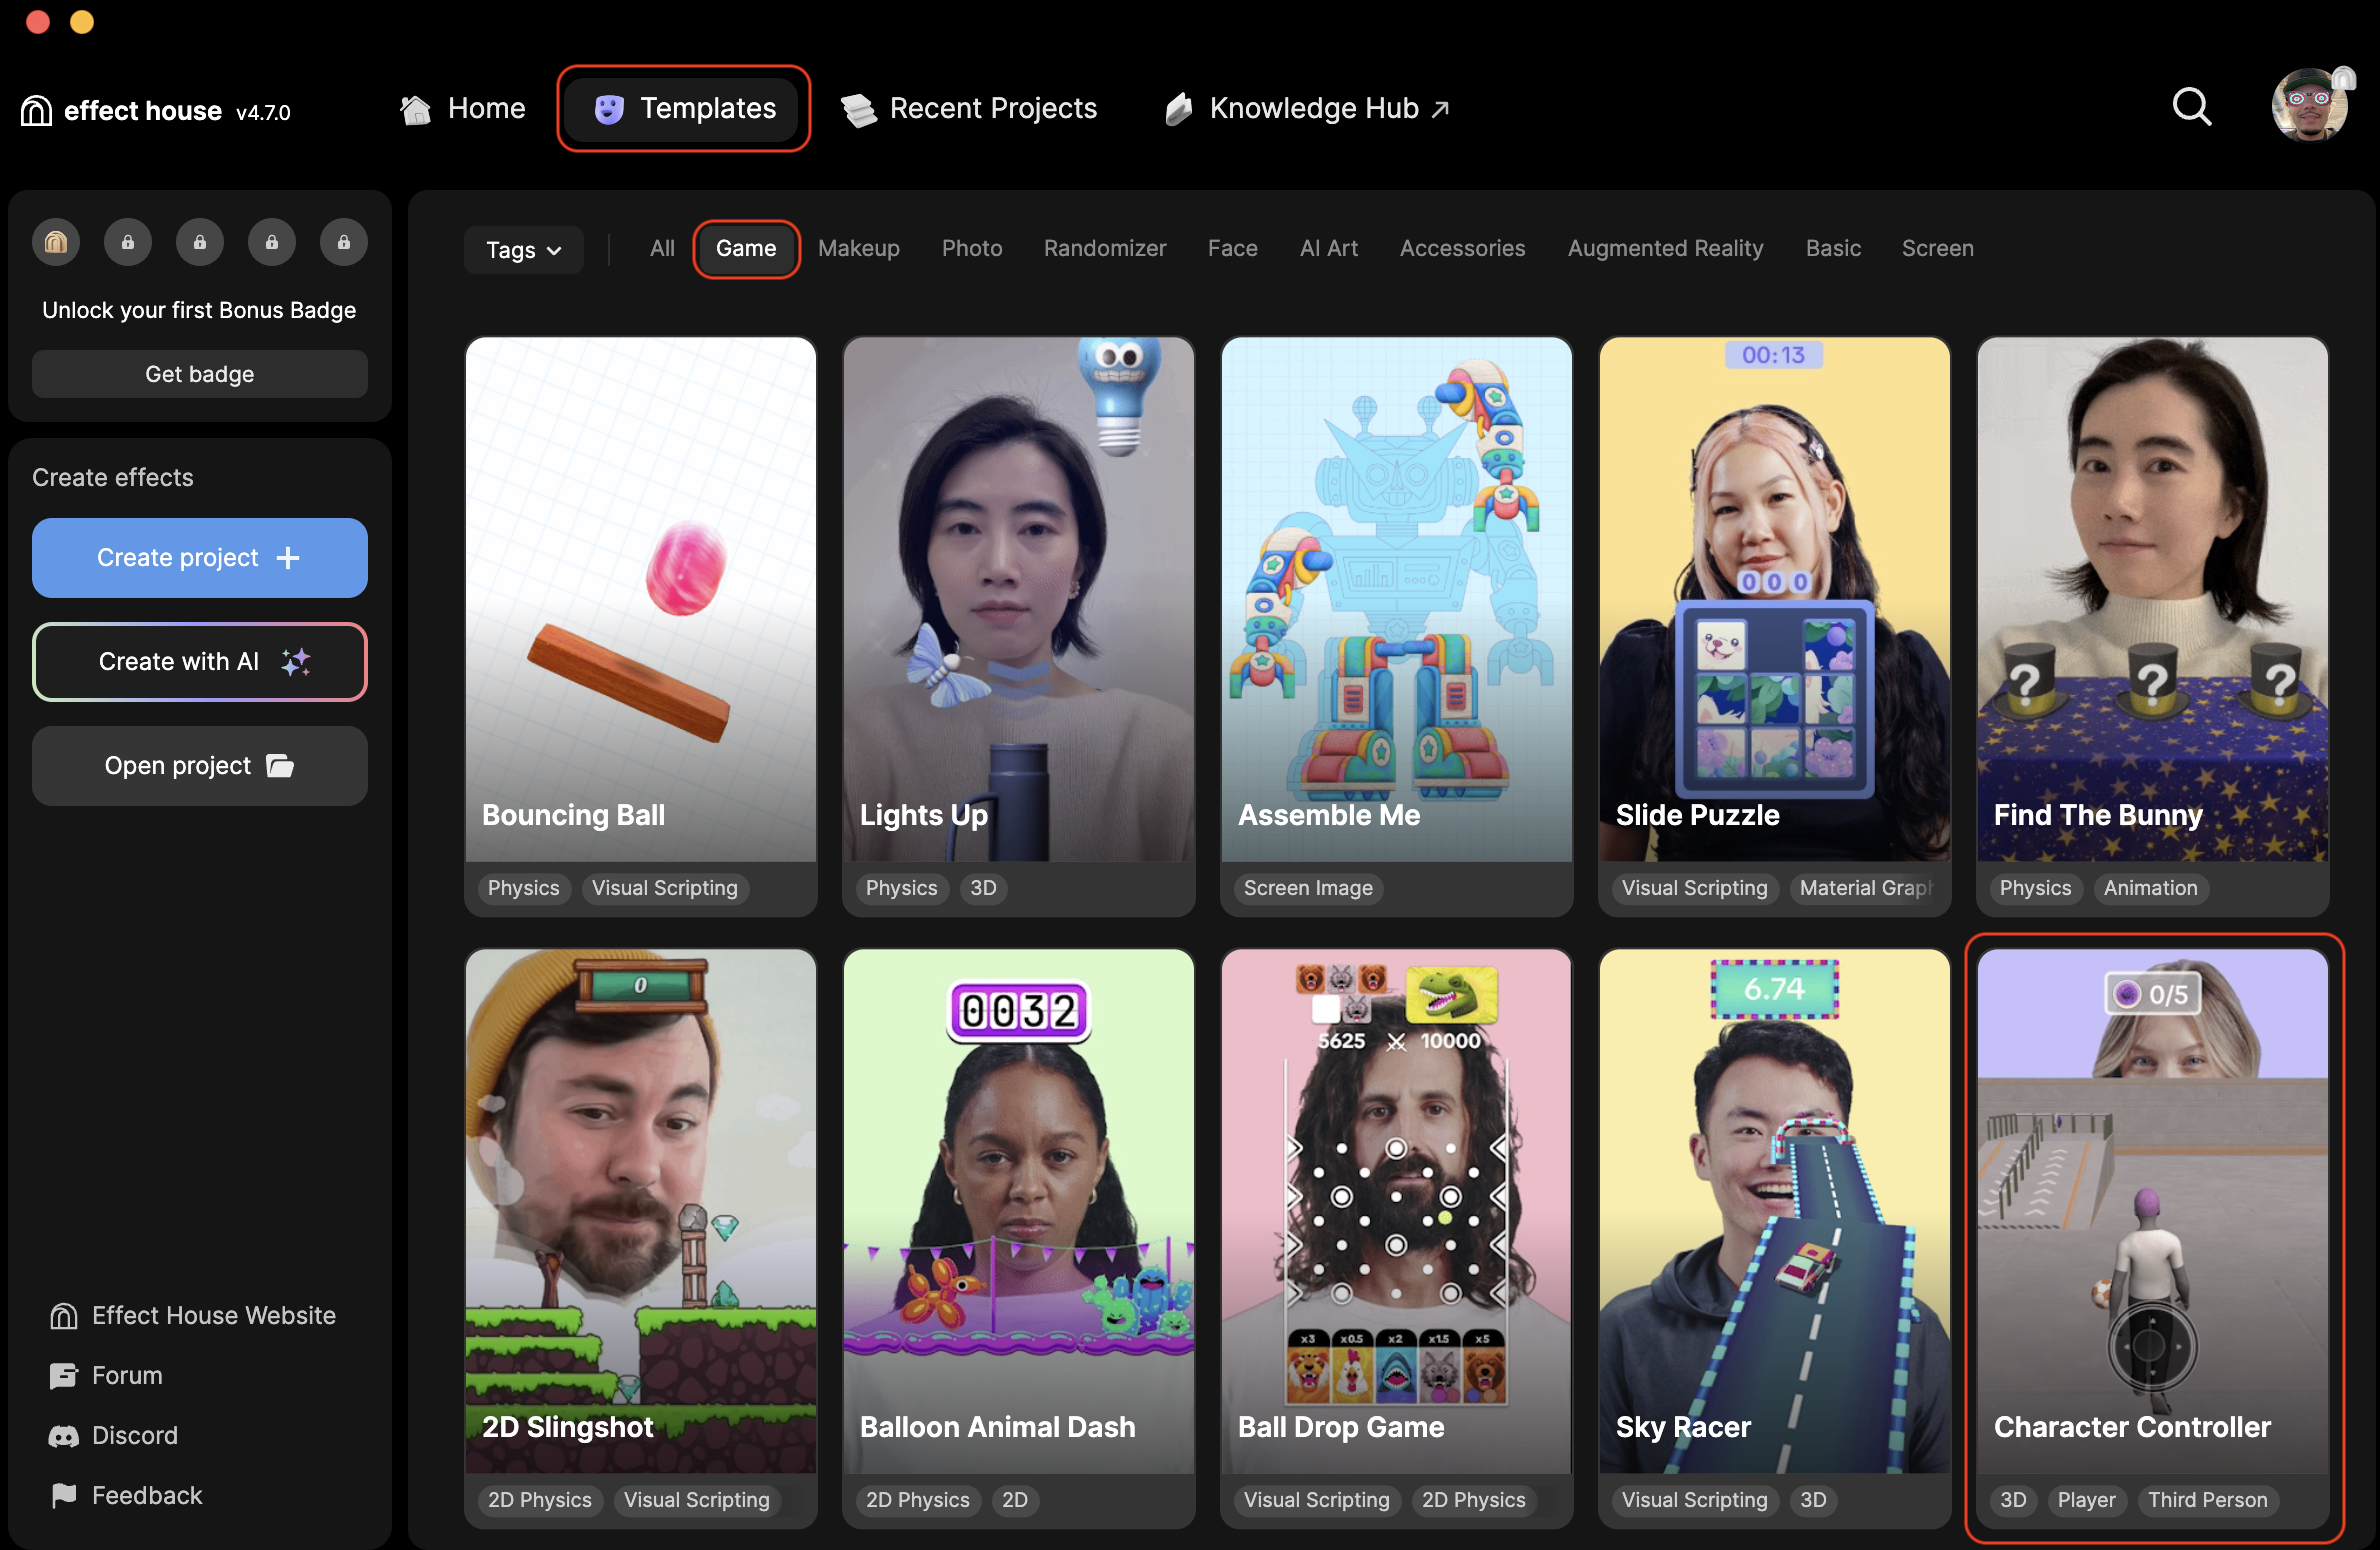
Open the Template
To use this template in your Effect House project:
- Go to Templates
- Click the Game tab
- Go to and select the Character Controller template
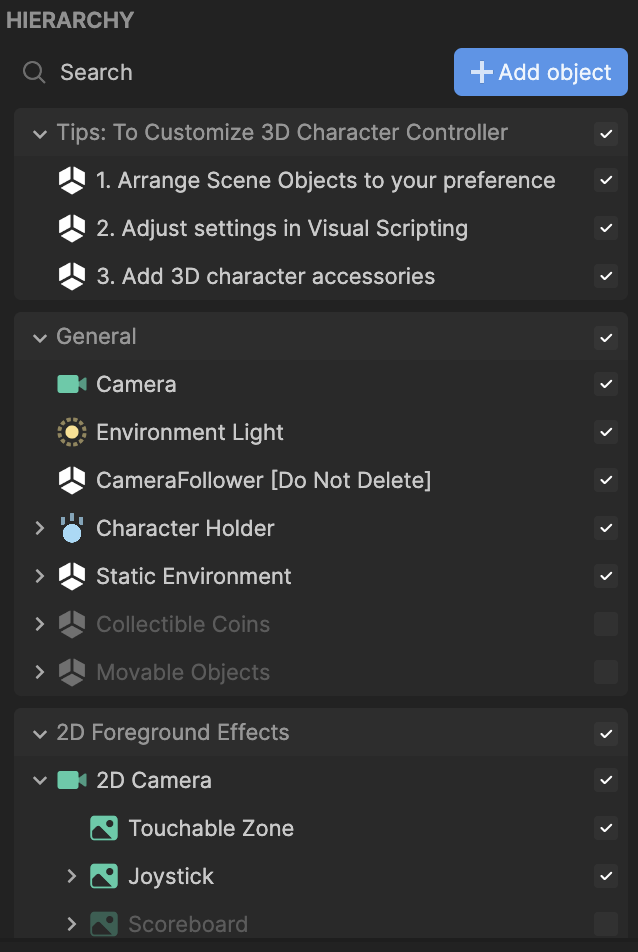
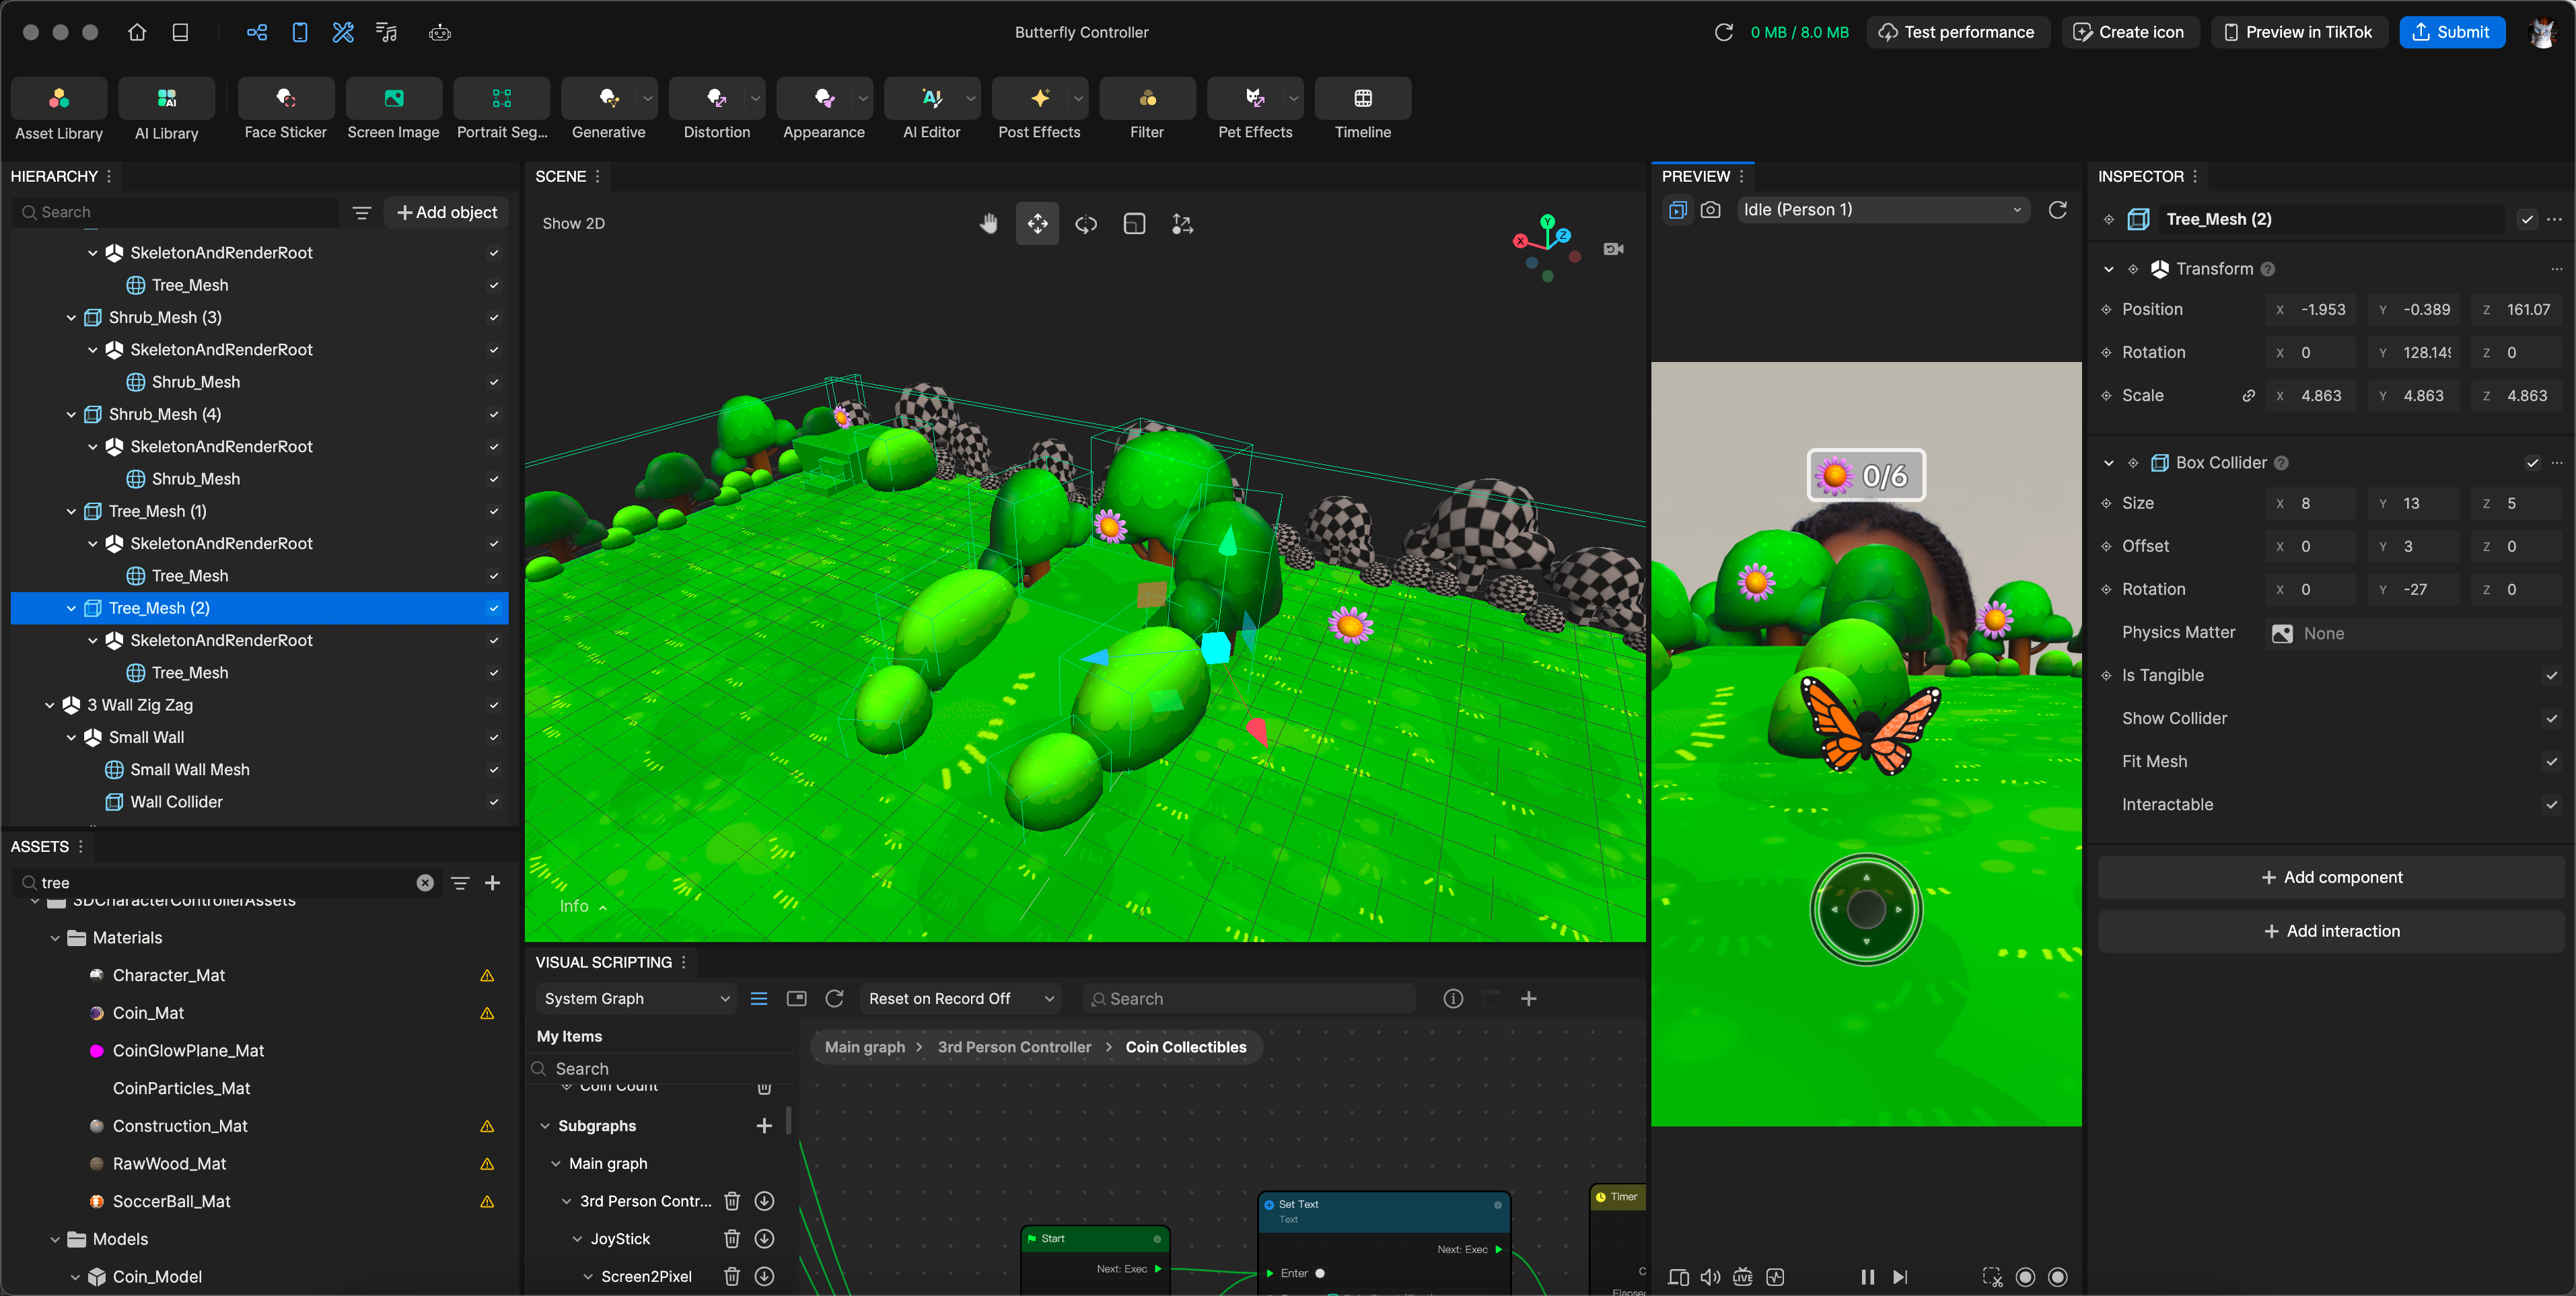
Hierarchy
The Hierarchy panel consists of the following render groups:
- Tips: To Customize 3D Character Controller contains helpful hints to customize the effect
- General renders the character model, static environment, and optional elements like collectible coins and movable objects
- 2D Foreground Effects contains the touchable zone, joystick, and optional scoreboard
The template's textures may appear blurry due to optimization for low-end devices. To adjust this, go to the Inspector panel and modify the Compression settings. For a balance between clarity and performance, set the Max Resolution parameter to 512.
Add 3D Character Accessories
You can further customize this game by adding your own accessories to the character. In this example, we'll add a black cowboy hat from the Asset library and onto the character!
- Go to the Asset Library
- Click Accessories
- Click the Black Cowboy Hat
- Click Import and apply
You'll notice the hat is now applied within the Hierarchy panel. In the next step, we'll need to move the hat within the Hierarchy panel and onto the Head_M object.
- Go to the Hierarchy panel
- Expand Character Holder, Player Character [Replace Model], SkeletonAndRenderRoot, and character_rig Now that the character_rig is open up, let's move the hat over.
- Drag the BlackCowboyHat_Model onto the Head_M object

- Delete the Black Cowboy Hat. This object is no longer needed once we move the BlackCowboyHat_Model onto the Head_M object.
The hat is now applied to your character's head, but we'll need to scale and move it so it fits on the character's head.
- Go to the Inspector panel and locate the Scale component
- Click the link icon. This action simultaneously scales the X, Y, and Z axes.
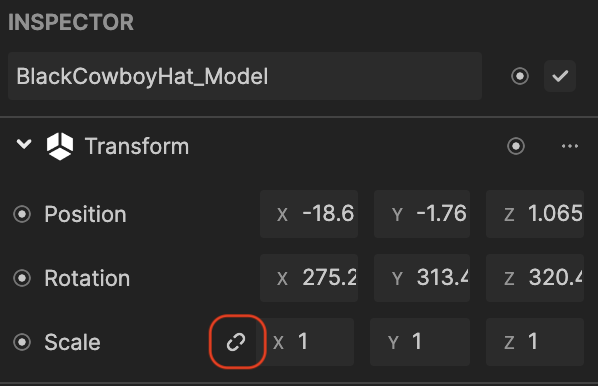
- Change the X axes value to 0.2. The hat is now resized to fit the character's head.
Next, we'll move the hat onto the character's head.
- Go to the Scene panel
- Drag the BlackCowboyHat_Model object and move it onto the character's head. You might have to make some slight adjustments to the position, rotation, and scale parameters in the Inspector panel until it's set to your liking.
With the same logic described above, repeat this process for other accessories you'd like to add onto your character.
When you add additional accessories, be sure to change the parameters in the Inspector panel or move them within the Scene panel.
Swap Assets
This template uses Visual Scripting to control the player character, animations, and collectible logic. Core assets such as the character model, animations, collectibles, environment meshes, and UI elements can be customized by replacing them directly in the Hierarchy panel.
The environment can be freely modified as long as colliders are properly adjusted to match any updated meshes.
Requirements
Before getting started, you should have:
- 3D models prepared for import
- A basic understanding of skeletal animations
- Familiarity with colliders
- Basic knowledge of Visual Scripting
Downloadable Assets
Assets used for this demo: ↓ ButterflyControllerAssets.zip
Final Effect House project with Assets replaced: ↓ ButterflyController.zip
To import the assets from above:
- Go to the Assets panel
- Click the Add asset button [+]
- Go to Import and click From Computer
Swap the Player Character
Let's get started by swapping out your new character model under the Player Character object in the Hierarchy panel.
- Go to the Assets panel
- Click on Butterfly_Mesh and drag it onto Player Character [Replace Model]
- Uncheck SkeletonAndRenderRoot
Next, adjust the scale, position, and orientation in the Scene panel or Inspector panel as needed.
To adjust the position, rotation, or scale in the Inspector panel:
- Go to the Inspector panel
- Click on an adjustment
- Enter new position values
The assets position is now updated.
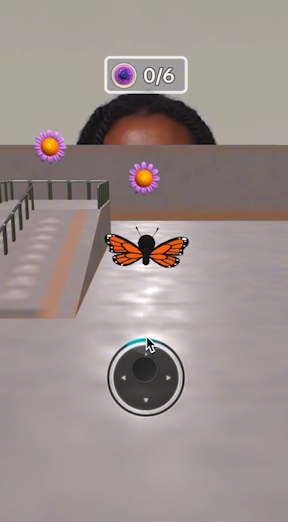
Demo
Apply Idle, Slow, and Fast Animations
After replacing the character model, you will need to reconnect the animation logic, so the correct animations play at different movement speeds.
- Go to the Visual Scripting panel
- Go to the 3rd Person Controller node
- Select None
- Click 3rd Person Controller
- Select the new asset SkeletonAndRenderRoot
- Open the 3rd Person Controller subgraph. Then open the Animation Controller subgraph and adjust the index values as needed.
You can now preview the effect and see different animations trigger at different movement speeds.
If you cannot directly replace the transform in the Get Component node due to node type differences, delete the original node and directly replace the animation node inside the Controller subgraph.
Demo
Swap Collectible Coins
To replace the default coin model with your own collectible asset:
- Drag your new collectible model under each Coin X group in the Hierarchy panel
- Turn off the original SkeletonAndRenderRoot object by unchecking its visibility
- Adjust the position, rotation, and scale values in the Inspector panel as needed
To manage repeated collectibles more efficiently, create a Prefab of your model and use it to replace each coin instance in the Hierarchy panel.
Demo
Add Additional Collectibles
To add more collectibles beyond the five included in the template:
- Duplicate an existing collectible group in the Hierarchy panel
- Move the duplicated group to your desired location in the Scene panel
- Go to the Visual Scripting panel and open the Coin Collectibles subgraph
- Duplicate the Collectible Collision node
- Replace the component reference with your new collectible
- Connect the output to Coin Count
The collectible will now disappear upon collision and increment the UI counter.
Demo
Update the Scoreboard Total
- Locate the Append Strings node in the Visual Scripting panel
- Adjust the value of String 1 so the UI scoreboard reflects the correct total number of collectibles
Demo
Update the Collectible Icon
- Go to the Hierarchy panel
- Go to 2D Foreground Effects
- Click Coin Icon
- Go to the Inspector panel
- Click Texture
- Replace it with your own image asset
Demo
Swap the Environment
You can further customize your game by replacing environment assets. Be sure to update colliders to match any new meshes.
Replace the Floor Mesh
- Select the floor object in the Hierarchy panel
- Replace the existing mesh with your new asset
- Adjust the collider component as needed to match the new mesh shape and size
Demo
Replace Wall Meshes and Adjust Colliders
- Select the wall object in the Hierarchy panel
- Replace the existing mesh with your new wall asset
- Update or resize the collider component to match the new mesh dimensions
Demo
Modify Ramps, Platforms, and Obstacles
- Select an existing ramp or platform in the Hierarchy panel
- Replace its texture or mesh as desired
- Adjust the collider to ensure accurate collision behavior
You can also:
- Add new obstacles and apply appropriate collider components
- Remove any objects that are not needed for your game
Final Game Preview
After customizing your assets and updating colliders:
- Test the effect in the Preview panel
- Confirm that movement, animations, collisions, and UI elements function correctly
- Make final adjustments as needed
Visual Scripting
The 3rd Person Controller subgraphs allows you to customize the behavior of the characters movement.
When testing out the various settings, make sure you test them out on a mobile device for accuracy.

- Controller Sensitivity controls how much your finger needs to move to affect the on-screen joystick. Lower values require your finger to move within a larger radius, giving you more precise control.
- Move Speed controls the move speed of the character
- Turn Speed controls the sensitivity of the character to turn left or right
- Walk/Run Threshold controls the speed threshold that will trigger the switch between walking and running animations